Welcome to our comprehensive guide on the Chhena Poda recipe, a popular dessert from the state of Odisha in India. Our team of expert writers and chefs have worked hard to bring you the most detailed and informative guide on how to make this delicious dessert at home.
What You Need To Make Chhena Poda Cake Recipe
- panner or chenna
- jaggery powder
- Sugar
- cardamom powder
- rice
- Ghee
Chhena Poda Cake Recipe
Ingredients
- 250 grams panner or chenna
- ½ cup sugar or 125 grams sugar or ½ cup jaggery powder
- ½ teaspoon cardamom powder
- ½ teaspoon rice flour
- cashews and raisins can be added
- 1 to 2 teaspoons Ghee or as needed for greasing tray/pan
Instructions
- To start, prepare a baking dish by lining it with chopped banana leaves, creating a natural and aromatic base. Spread a generous layer of ghee over the leaves, making sure to coat them evenly.
- Alternatively, if banana leaves are not available or preferred, one can opt for butter paper or parchment paper. If in a hurry, one can skip the lining altogether and simply grease the pan with ghee on all sides for easy release of the final product.
- To ensure even baking, it is important to preheat the oven at 180 degrees Celsius for at least 15 minutes prior to placing the dish inside. This will help create the desired texture and flavor while cooking the ingredients to perfection.
Making Chhena Poda Mixture
- Take 250 grams of fresh paneer or chenna and crumble it thoroughly.
- Add ½ cup of sugar to the paneer, or you can substitute with ½ cup of jaggery powder.
- Mix the sugar with the chenna using clean hands.
- Proceed to knead and mash the paneer or chenna, similar to how you would knead chapati dough.
- The paneer mixture should have a loose, light consistency, like cake batter. A softer consistency will enhance the taste of chhena poda.
- No milk or water is added initially. If the mixture appears dry, add a few tablespoons of milk or water. Some fat is released while mashing the chenna, which is acceptable.
- Once the paneer mixture has a cake batter-like consistency, add ½ teaspoon of cardamom powder and ½ tablespoon of rice flour. You may also add a pinch of baking soda, but it will not significantly impact the final product. Alternatively, you can use fine rava (sooji) instead of rice flour. Additionally, you may include chopped dry fruits such as cashews, almonds, and raisins.
Notes
- Calories 195
- Fat 99% Daily Value
- Fat 11g17%
- Saturated Fat 6g38%
- Cholesterol 29mg10%
- Sodium 10mg0%
- Carbohydrates 18g6%
- Sugar 16g18%
- Protein 5g10%
- Calcium 200mg20%
Pro Tips for Making Chhena Poda Cake
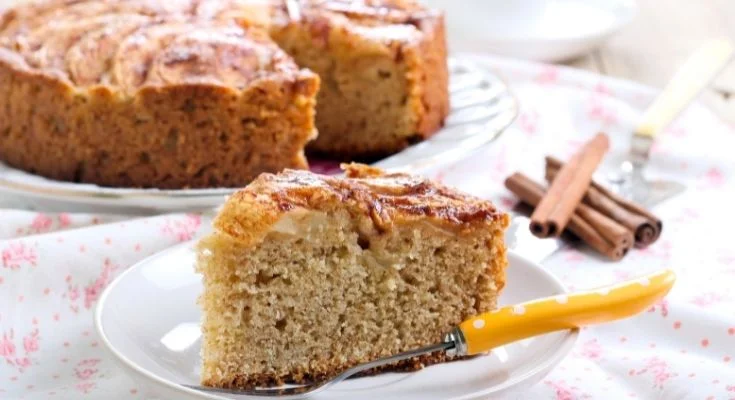
Chhena Poda Cake is a popular dessert from the eastern state of Odisha in India. It is a unique dessert made from chhena, a type of cheese made from milk. Chhena Poda Cake is a perfect blend of sweetness and texture, making it a favorite among dessert lovers. In this article, we will share our pro tips for making the perfect Chhena Poda Cake that will leave your taste buds craving for more.
Choose the Right Ingredients
To make a perfect Chhena Poda Cake, you need to start with the right ingredients. You need fresh and high-quality milk to make the chhena. You also need sugar, cardamom powder, semolina, and ghee. Make sure you choose the best quality ingredients to ensure the best taste and texture.
Make the Chhena
The first step in making Chhena Poda Cake is to make the chhena. To make the chhena, heat the milk in a pan and bring it to a boil. Once the milk starts boiling, add lemon juice or vinegar to it. The acid in the lemon juice or vinegar will curdle the milk and separate the curds from the whey. Strain the mixture using a muslin cloth and let it cool for a few minutes.
Once the chhena has cooled down, knead it for at least 10-15 minutes until it becomes smooth and free of lumps. This is an important step as it ensures that the chhena is of the right texture and consistency, which is crucial for making a perfect Chhena Poda Cake.
Add Flavor
To add flavor to the Chhena Poda Cake, you need to add sugar and cardamom powder to the chhena mixture. The amount of sugar and cardamom powder you add will depend on your personal preference. We recommend adding 1 cup of sugar and 1 tablespoon of cardamom powder for a perfect blend of sweetness and aroma.
Add Semolina
Adding semolina to the chhena mixture is an important step as it helps to give the Chhena Poda Cake its characteristic texture. Semolina also helps to bind the ingredients together and prevents the cake from crumbling. We recommend adding 1 cup of semolina to the chhena mixture.
Bake the Cake
To bake the Chhena Poda Cake, you need to preheat the oven to 180 degrees Celsius. Grease a cake tin with ghee and pour the chhena mixture into the tin. Smooth the surface of the mixture with a spatula and bake the cake for 40-45 minutes or until the top turns golden brown.
Cool and Serve
Once the Chhena Poda Cake is baked, let it cool down for at least 30 minutes before serving. You can serve the cake as it is or with a scoop of vanilla ice cream on top. Chhena Poda Cake tastes best when served warm or at room temperature.
Conclusion
Chhena Poda is a delicious dessert that is easy to make at home with just a few simple ingredients. We hope our guide has been helpful in teaching you how to make this classic Odia dessert. With our detailed instructions and helpful tips, you’ll be able to impress your friends and family with your newfound baking skills. Try it out today and let us know how it turned out!
You May Also Like