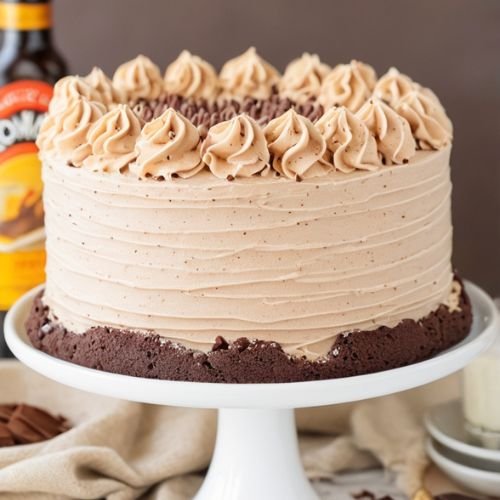
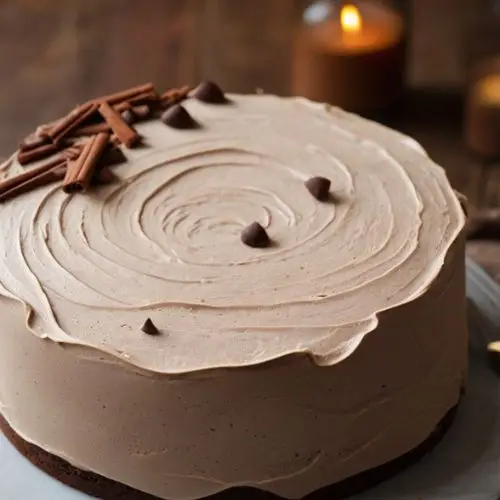
If you’re craving a cake that’s rich in flavor and filled with the goodness of chocolate, this Chocolate Cacao Nib Cake is the perfect choice.
With its delightful combination of smooth almond flour, earthy cacao nibs, and a touch of natural sweetness from coconut sugar, this cake is a treat for both chocolate lovers and health-conscious bakers alike.

Plus, it’s gluten-free and naturally sweetened, making it a great option for a variety of dietary preferences.
This cake is simple to make, yet it delivers a complex flavor profile that will impress everyone at your next gathering.
Cacao nibs add a wonderful crunch and deep chocolate flavor, while almond flour keeps the texture moist and tender. Whether you’re enjoying it for an afternoon snack or serving it for a special occasion, this cake is sure to be a hit!
Ingredients List
Cake Ingredients
- 1/4 cup (4 tablespoons) unsalted butter (plus more for greasing the pan)
- 2/3 cup raw or coconut sugar
- 1/4 teaspoon sea salt
- 1 teaspoon pure vanilla extract
- 2 large eggs (room temperature)
- 1/2 cup buttermilk (can substitute with almond milk for dairy-free)
- 1 cup lightly packed almond flour
- 1/4 cup tapioca flour
- 1/2 teaspoon baking soda
- 3 tablespoons cacao nibs
Required Kitchen Tools
To make this cake, having the right kitchen tools will make your baking experience smooth and enjoyable. Here are the essentials you’ll need:
- Mixing Bowls: You’ll need a couple of mixing bowls—one for dry ingredients and one for wet ingredients.
- Hand or Stand Mixer: This will help you beat the eggs and mix the wet ingredients quickly.
- Spatula or Whisk: For stirring in the dry ingredients and scraping the bowl.
- 9-inch Cake Pan: A round, 9-inch cake pan works perfectly for this recipe. Be sure to grease it well with butter to prevent sticking.
- Cooling Rack: Allow the cake to cool evenly after baking on a cooling rack before slicing and serving.
Cake Preparation: Mixing and Baking
Baking this Chocolate Cacao Nib Cake is a breeze—just follow these simple steps to create a moist, decadent cake. The key is to ensure your ingredients are well combined, so the cake rises beautifully and develops that rich, chocolatey flavor.
1. Preheat and Prepare the Pan
Start by preheating your oven to 350°F (175°C). Grease your 9-inch cake pan with a bit of unsalted butter or line it with parchment paper to prevent sticking. This ensures that your cake will come out of the pan without any trouble after baking.
2. Cream the Butter and Sugar
In a mixing bowl, beat together the butter and coconut sugar until smooth and creamy. You can use a hand mixer or a stand mixer for this step. This process should take about 2 minutes, and it’s important to get the mixture light and fluffy, as this will help the cake rise during baking.
3. Add Eggs and Vanilla
Next, add the eggs one at a time, beating well after each addition. Then, stir in the vanilla extract. The mixture will look a little bit runny, but that’s perfectly fine! This step ensures the wet ingredients are properly combined, creating a base for the cake batter.
4. Combine the Dry Ingredients
In a separate bowl, whisk together the almond flour, tapioca flour, sea salt, and baking soda. Stir the dry ingredients well to make sure everything is evenly distributed. The almond flour gives the cake a lovely texture, while the tapioca flour helps with structure and gives the cake its moistness.
5. Alternate Adding Dry Ingredients and Buttermilk
Now it’s time to add the dry ingredients and buttermilk to the wet mixture. Start by adding half of the dry ingredients, mixing gently with a spatula or whisk. Then, pour in the buttermilk and stir until well combined. Finally, add the remaining dry ingredients and stir until the batter is smooth and well incorporated. Be careful not to overmix, as this can affect the texture.
6. Stir in Cacao Nibs
Once your batter is mixed, fold in the cacao nibs. These little nuggets of chocolate add a delightful crunch and burst of flavor that pairs perfectly with the richness of the cake.
Baking the Cake and Ensuring Perfect Texture
Now that your Chocolate Cacao Nib Cake batter is ready, it’s time to bake it to golden perfection. Follow these steps for a moist and flavorful cake every time.
1. Pour the Batter into the Pan
Pour the prepared batter into your greased 9-inch cake pan. Use a spatula to smooth the top and ensure the batter is evenly distributed. This will help the cake rise evenly in the oven, giving you a nice, flat surface to work with.
2. Bake the Cake
Place the cake pan in the preheated oven and bake for 25-30 minutes, or until a toothpick inserted into the center comes out clean (or with just a few moist crumbs). Keep an eye on the cake as it bakes; ovens can vary in temperature, so it might be a good idea to check the cake after about 25 minutes to avoid over-baking.
3. Cool the Cake
Once the cake is done, remove it from the oven and place the pan on a wire rack to cool for 10 minutes. This resting period helps the cake firm up a bit, making it easier to remove from the pan without falling apart. After 10 minutes, run a knife around the edge of the pan to loosen the cake, then carefully flip it out onto the wire rack to cool completely.
4. Check for Doneness
If you’re unsure whether the cake is fully baked, gently press the center of the cake with your finger. If it springs back and doesn’t leave an indent, it’s ready. If the cake still feels soft or moist in the center, bake it for another 5 minutes and test again.
Serving, Decoration, and Storage Tips
Now that your Chocolate Cacao Nib Cake is ready, it’s time to serve and enjoy it. Whether you’re serving it for a special occasion or simply enjoying a sweet treat, here are some ideas for presenting your cake, along with tips on how to store it for later.
Suggested Serving Ideas
This cake is delicious on its own, but you can elevate it with a few simple touches:
- Whipped Cream or Coconut Cream: A dollop of freshly whipped cream (or coconut cream for a dairy-free option) pairs beautifully with the rich chocolate flavor of the cake. You can also add a sprinkle of cocoa powder or a few extra cacao nibs on top for added texture and visual appeal.
- Berries or Fresh Fruit: Fresh raspberries, strawberries, or even sliced bananas complement the cake’s sweetness and add a refreshing contrast to the dense texture of the cake.
- Chocolate Ganache: For an extra indulgent touch, drizzle a simple chocolate ganache over the cake. To make the ganache, heat 1/4 cup of heavy cream and pour it over 1/2 cup of chopped chocolate. Stir until smooth and pour over the cooled cake.
- Dusting of Powdered Sugar: For a simple and elegant presentation, dust the top of the cooled cake with powdered sugar just before serving.

Storing the Cake
This Chocolate Cacao Nib Cake stays fresh for several days when stored properly:
- Room Temperature: Store the cake at room temperature in an airtight container for up to 3 days. The cake will stay moist and delicious, ready for an afternoon snack or a dessert after dinner.
- Refrigeration: If you live in a warm climate or want to keep the cake fresh longer, store it in the fridge for up to 5 days. Make sure to let it come to room temperature before serving for the best flavor and texture.
Freezing the Cake
If you want to save the cake for later, freezing is a great option. Simply slice the cake and wrap each slice individually in plastic wrap, then place in a freezer-safe bag or container. You can freeze the slices for up to 1 month. To reheat, simply let the slices thaw at room temperature or warm them in the microwave for a few seconds.
Conclusion
Whether you’re a fan of rich chocolate cakes or just looking for a healthier dessert option, this Chocolate Cacao Nib Cake delivers on both flavor and texture. With the combination of almond flour, cacao nibs, and coconut sugar, it’s a treat that satisfies your sweet tooth without all the refined sugars. The easy preparation, along with the option to decorate or serve it in a variety of ways, makes this cake a versatile choice for any occasion.
With the proper storage techniques, you’ll be able to enjoy this cake for days to come. So gather your ingredients, follow the simple steps, and treat yourself to a slice of this delightful, chocolatey goodness!


