Craving a creamy, dreamy dessert? This Easy Banana Pudding is the perfect no-bake treat that layers vanilla wafers, ripe bananas, and smooth vanilla pudding for an irresistible classic.
Perfect for a family gathering, potluck, or simply satisfying your sweet tooth, this simple yet delicious dessert is always a crowd-pleaser.
Ingredients List
Creating the perfect Banana Pudding requires just a few simple ingredients. Each component plays a crucial role in achieving the rich, creamy texture and sweet banana flavor that makes this dessert so special.
Main Ingredients
- 1 (11-ounce) box vanilla wafer cookies – Adds a crisp texture that softens beautifully as it sets.
- 1 (3.4-ounce) box vanilla instant pudding mix – Provides a smooth and creamy base for the pudding.
- 2 cups cold milk – Needed to prepare the instant pudding mix.
- 3-4 large ripe bananas – Sweet and perfectly soft, bananas are the star of this dessert.
- 1 (8-ounce) container frozen whipped topping (such as Cool Whip), thawed – Light and fluffy, it gives the pudding its signature airy finish.
Required Kitchen Tools
To make the Easy Banana Pudding, you don’t need any fancy equipment—just a few basic tools to bring this dessert together effortlessly.
- Mixing Bowl – To prepare the instant pudding mixture.
- Whisk or Electric Mixer – Helps ensure a smooth and lump-free pudding.
- Spatula – Ideal for spreading the pudding evenly over the layers.
- 11 x 7-inch Baking Dish – The perfect size for layering the cookies, bananas, and pudding.
- Knife & Cutting Board – To slice the bananas evenly.
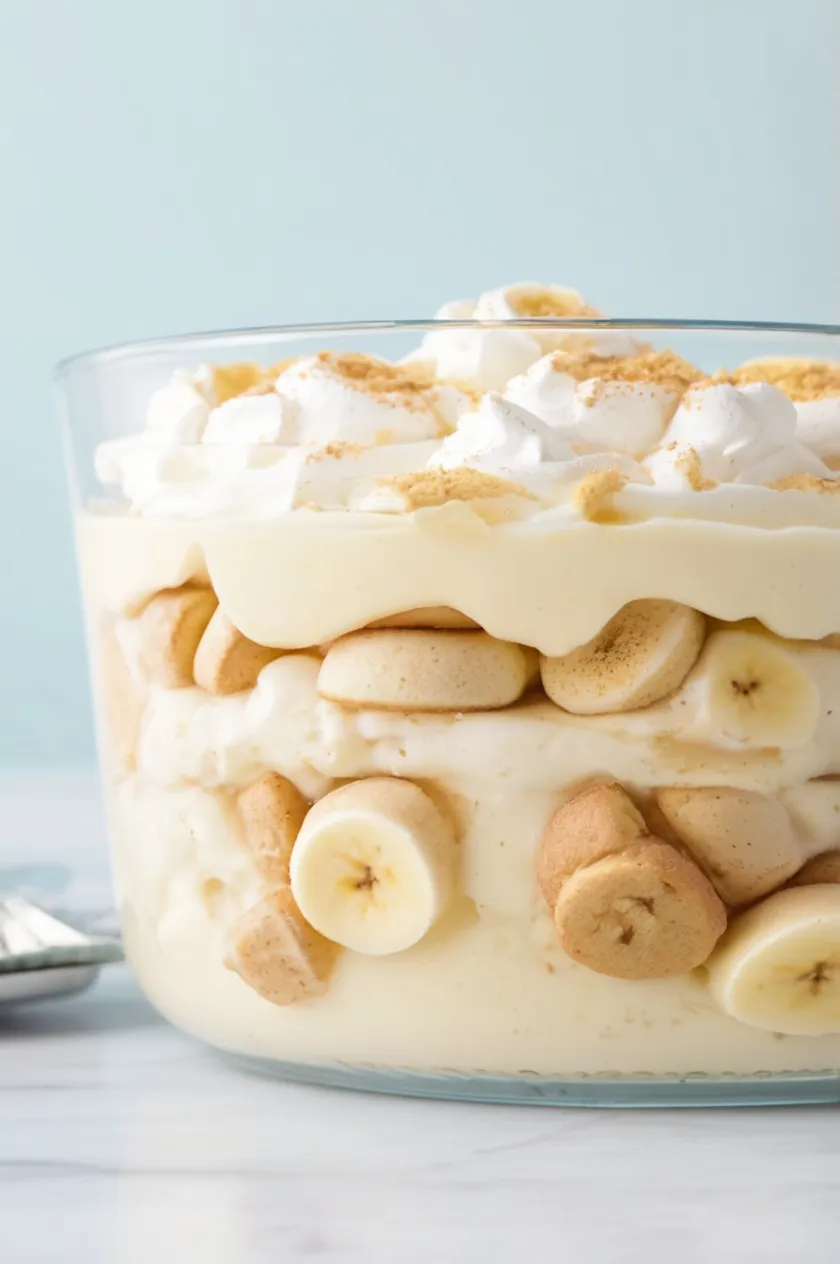
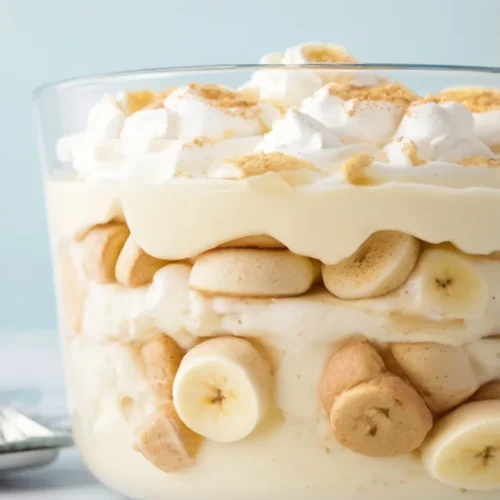
Layering the Banana Pudding
Assembling Banana Pudding is all about creating perfect layers that balance flavor and texture. Follow these steps to achieve the ideal dessert structure:
Step 1: Prepare the Pudding
Start by preparing the vanilla pudding according to the package instructions. In a mixing bowl, whisk together the pudding mix and 2 cups of cold milk until smooth and thickened. Refrigerate the pudding for a few minutes to allow it to set.
Step 2: First Layer – Vanilla Wafers
Arrange a single layer of vanilla wafer cookies on the bottom of an 11 x 7-inch baking dish. The cookies will act as the base of your pudding, soaking up flavors as it sets. You’ll need about 24 cookies for each layer, depending on your dish size.
Step 3: Second Layer – Pudding
Using a spatula, spread half of the prepared vanilla pudding (about 1 cup) evenly over the cookies. Make sure to cover the entire layer for a smooth, creamy consistency.
Step 4: Third Layer – Bananas
Slice 3-4 ripe bananas into thin, even pieces and layer them over the pudding. For best results, use fresh, firm bananas to maintain a good texture.
Step 5: Repeat the Layers
Repeat the process, starting with another layer of vanilla wafers, followed by the remaining pudding, and finally another layer of banana slices.
At this point, your banana pudding is beautifully layered and ready for its finishing touch!
Final Layer & Chilling
The last step in making banana pudding is adding the creamy, fluffy topping and allowing the flavors to meld together.
Step 6: Top with Whipped Topping
Spread a generous layer of thawed whipped topping (such as Cool Whip) over the final layer of banana slices. Use a spatula to smooth it out evenly, covering the entire surface of the pudding. This creamy layer not only enhances the flavor but also helps seal in moisture.
Step 7: Refrigerate for Best Flavor
For the best results, cover the baking dish with plastic wrap and refrigerate for at least 4 hours (or overnight). This allows the vanilla wafers to absorb moisture from the pudding and bananas, creating a soft, cake-like texture while keeping the layers intact.
Serving and Garnishing
Once your banana pudding has been properly chilled, it’s time to add the finishing touches and serve this delightful dessert.
Step 8: Add the Final Garnishes
Just before serving, enhance the visual appeal and flavor of your pudding with some delicious toppings:
- Extra Vanilla Wafers – Crush or place whole wafers on top for a decorative crunch.
- Fresh Banana Slices – Arrange additional banana slices on top for a fresh and fruity finish.
- Caramel Drizzle – For a sweet twist, drizzle caramel sauce over the whipped topping.
Step 9: Serve & Enjoy
Use a serving spoon to scoop generous portions into dessert bowls or cups. Serve immediately and enjoy the perfect combination of creamy pudding, soft wafers, and sweet bananas.
Storage Instructions
To keep your banana pudding fresh, follow these simple storage tips:
Refrigeration
Store leftovers in an airtight container in the refrigerator for up to 2 days. After this time, the bananas may start to brown, and the texture of the pudding may soften too much.
Freezing (Not Recommended)
While banana pudding can technically be frozen, it is not recommended due to the texture changes. The bananas may become mushy, and the whipped topping can separate when thawed.
Easy Banana Pudding
Ingredients
- 1 (11-ounce) box vanilla wafer cookies
- 1 (3.4-ounce) box vanilla instant pudding mix
- 2 cups cold milk
- 3-4 large ripe bananas
- 1 (8-ounce) container frozen whipped topping
Instructions
- Follow the package instructions to prepare the vanilla instant pudding using 2 cups of milk. Refrigerate and set aside.
- Arrange vanilla wafer cookies in a single layer on the bottom of an 11 x 7-inch baking dish.
- Spread half of the prepared pudding (about 1 cup) evenly over the cookies.
- Place a single layer of banana slices over the pudding.
- Add another layer of vanilla wafers, followed by the remaining pudding, and then another layer of banana slices.
- Spread the thawed whipped topping evenly over the final banana layer, smoothing it with a spatula.
- Cover the dish with plastic wrap and chill for at least 4 hours or overnight for the best flavor and texture.
- Before serving, add extra vanilla wafers and banana slices for decoration. Scoop and enjoy!
Conclusion
Making Easy Banana Pudding at home is a simple yet rewarding process. With layers of crunchy vanilla wafers, creamy pudding, and sweet bananas, this no-bake dessert is a crowd-pleaser for any occasion. Enjoy it fresh or chilled overnight—each bite delivers a nostalgic, comforting taste everyone will love.