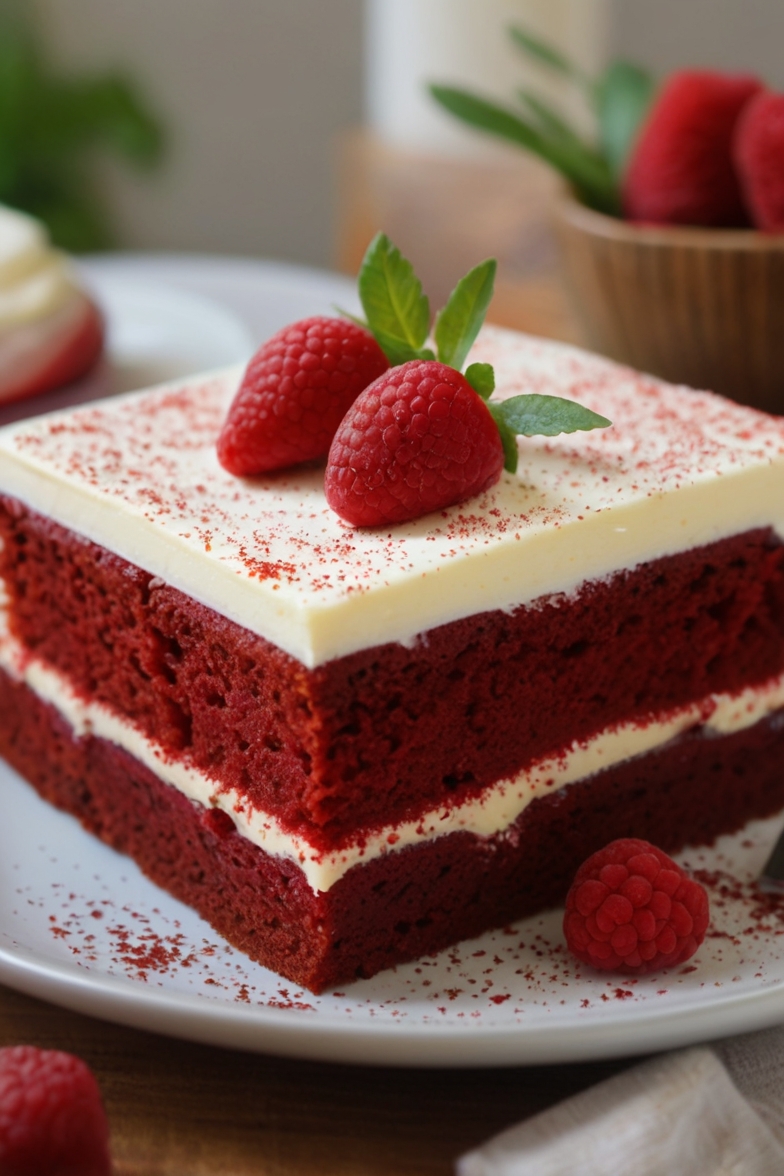
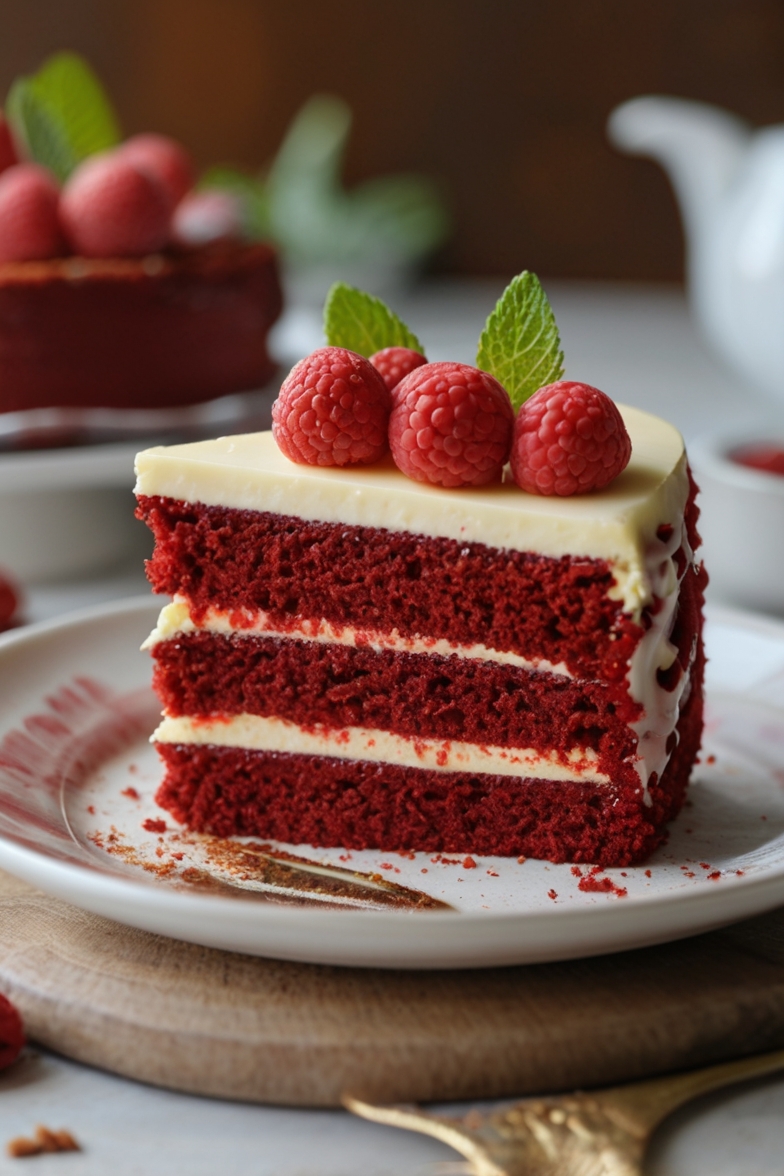
Craving a deliciously decadent dessert that combines two of the most beloved cakes? Look no further than the Red Velvet Cheesecake Cake!

This indulgent treat layers moist, vibrant red velvet cake with creamy cheesecake filling, topped with luscious cream cheese frosting.
Whether you’re celebrating a special occasion or just treating yourself, this cake is sure to impress with its stunning layers and rich flavor profile.
Ingredients List
Cheesecake Ingredients
- Two 8-ounce packages cream cheese, at room temperature
- ⅔ cup granulated white sugar
- Pinch of salt
- 2 large eggs
- ⅓ cup sour cream
- ⅓ cup heavy whipping cream
- 1 teaspoon vanilla extract
Red Velvet Cake Ingredients
- 2½ cups all-purpose flour
- 1½ cups granulated white sugar
- 2 tablespoons unsweetened cocoa powder
- 1½ teaspoons baking soda
- 1 teaspoon salt
- 2 large eggs, at room temperature
- 1½ cups vegetable or canola oil
- 1 cup buttermilk
- ¼ cup (two 1-ounce bottles) red food coloring
- 2 teaspoons vanilla extract
- 2 teaspoons white vinegar
Cream Cheese Frosting Ingredients
- 2½ cups powdered sugar, sifted to remove lumps
- Two 8-ounce packages cream cheese, at room temperature
- ½ cup (1 stick) unsalted butter, at room temperature
- 1 tablespoon vanilla extract
Required Kitchen Tools
Having the right tools can make all the difference in creating this Red Velvet Cheesecake Cake. To ensure smooth preparation and a perfect result, gather the following essential tools:
- Mixer (Hand or Stand): Mixing both the cheesecake filling and red velvet cake batter will be much easier with an electric mixer. A stand mixer is ideal for hands-off mixing, while a hand mixer gives you more control.
- Springform Pan: The cheesecake layer will bake perfectly in a springform pan, allowing for easy release after cooling.
- 9-inch Round Cake Pans: For the red velvet layers, you’ll need two 9-inch round cake pans. Grease and line them with parchment paper for easy cake removal.
- Spatula: A large spatula is essential for folding and spreading the cake batter and cream cheese frosting evenly.
- Cooling Racks: Letting your cakes cool properly before assembling the layers is key for preventing soggy layers and frosting meltdown.
These tools will set you up for success and ensure that your Red Velvet Cheesecake Cake turns out beautifully!
Cheesecake Layer Preparation
The cheesecake layer is the creamy, dreamy heart of this cake. To ensure a perfectly smooth and velvety cheesecake filling, follow these simple steps:
Mixing the Cheesecake Filling
- Prepare the Cream Cheese Mixture:
Begin by beating the cream cheese and granulated sugar together in a large bowl using a hand or stand mixer. Beat until smooth and creamy, with no lumps remaining. This step ensures your cheesecake filling will have a silky texture. - Add Eggs and Dairy:
Add eggs, one at a time, ensuring each is fully incorporated before adding the next. Then, mix in the sour cream, heavy whipping cream, and vanilla extract. Continue mixing on low speed until everything is fully combined. - Pour and Bake:
Pour the cheesecake batter into the prepared springform pan. Smooth the top with a spatula, and then gently tap the pan on the counter to release any air bubbles. Bake the cheesecake at 325°F for 45-50 minutes or until the edges are set and the center has a slight jiggle. Allow the cheesecake to cool to room temperature before refrigerating for at least 4 hours, or overnight for best results.
Tips for Perfect Cheesecake
- Room Temperature Ingredients: Make sure your cream cheese and eggs are at room temperature to avoid lumps in the cheesecake filling.
- Avoid Overmixing: Overmixing the cheesecake batter can lead to cracks during baking. Mix just until the ingredients are combined.
Once your cheesecake layer is fully chilled, it’s ready to be added between the red velvet cake layers!
Red Velvet Cake Preparation
Now that the cheesecake layer is ready, it’s time to focus on the rich, velvety red velvet cake layers. This cake is moist, tender, and bursting with that signature red color. Follow these steps for a perfect cake:
Mixing the Red Velvet Cake Batter
- Combine the Dry Ingredients:
In a medium bowl, whisk together the all-purpose flour, granulated sugar, unsweetened cocoa powder, baking soda, and salt. Set aside. - Mix the Wet Ingredients:
In a large mixing bowl, whisk together the eggs, vegetable oil, and buttermilk. Add the red food coloring, vanilla extract, and white vinegar, and stir until the mixture is smooth and uniform in color. - Combine Wet and Dry Ingredients:
Gradually add the dry ingredients to the wet mixture, stirring gently with a spatula or mixing on low speed with a hand mixer. Mix until just combined; be careful not to overmix the batter, as this can affect the texture of the cake.
Baking the Red Velvet Cakes
- Prepare the Cake Pans:
Grease and line two 9-inch round cake pans with parchment paper. Divide the batter evenly between the pans, smoothing the tops with a spatula. - Bake and Cool:
Bake the cakes at 350°F for 25-30 minutes, or until a toothpick inserted into the center comes out clean. Allow the cakes to cool in the pans for about 10 minutes, then transfer them to a wire rack to cool completely.
Tips for Perfect Red Velvet Cake
- Use Room Temperature Ingredients: Like the cheesecake, make sure your eggs and buttermilk are at room temperature to ensure a smooth batter.
- Don’t Overmix the Batter: Overmixing the red velvet batter can result in a dense cake. Stir just until combined for a light, fluffy texture.
Once the red velvet cakes have cooled, they’re ready to be assembled with the cheesecake layer!
Assembling and Frosting the Cake

Now that both your cheesecake and red velvet cake layers are prepared, it’s time to assemble your masterpiece. The layers will come together beautifully to create a show-stopping dessert that will leave everyone asking for seconds!
Assembling the Cake
- Layer the Cakes and Cheesecake:
Start by placing one red velvet cake layer on your serving plate or cake stand. Gently remove the cheesecake from the springform pan, ensuring it is completely chilled and set. Place the cheesecake on top of the first layer of cake. Add the second layer of red velvet cake on top of the cheesecake, pressing down slightly to ensure the layers are stable. - Stabilizing the Layers:
You may want to refrigerate the cake for about 30 minutes before frosting it. This helps the cheesecake layer set further and ensures the layers stick together nicely.
Cream Cheese Frosting
- Prepare the Frosting:
In a large mixing bowl, beat the cream cheese and unsalted butter together until smooth and creamy. Gradually add the powdered sugar, one cup at a time, and continue to beat until the frosting is light and fluffy. Stir in the vanilla extract to finish off the frosting. - Frost the Cake:
Once your cake is stable, generously spread the cream cheese frosting over the top and sides of the cake. Use a spatula to create a smooth, even layer, or get creative with swirls and peaks for a more textured finish. - Decorate and Serve:
For an extra touch, you can decorate the top of your Red Velvet Cheesecake Cake with a few crumbs of leftover red velvet cake or even some fresh berries or chocolate shavings.
Tips for Perfect Frosting
- Room Temperature Butter and Cream Cheese: Ensure both the butter and cream cheese are at room temperature for smooth frosting.
- Chill Between Layers: If you’re stacking multiple layers, refrigerating the cake for 30 minutes before frosting helps stabilize the layers and makes the cake easier to frost.
Storing and Serving Your Cake
How to Keep Red Velvet Cheesecake Cake Fresh
After preparing this stunning cake, you’ll want to store it properly to maintain its freshness. The cake can be stored in the refrigerator for up to 4 days. Keep it covered with plastic wrap or in an airtight cake container to prevent the frosting from drying out.
Freezing Red Velvet Cheesecake Cake
If you have leftovers (which is rare!), you can freeze individual slices of the cake. Wrap them tightly in plastic wrap and foil, and store them in the freezer for up to 1 month. To thaw, simply leave the slices at room temperature for about an hour before enjoying them.
Conclusion
This Red Velvet Cheesecake Cake is a true showstopper. With its rich layers of moist red velvet cake and creamy cheesecake filling, it’s the perfect dessert for any celebration. Whether you’re serving it at a holiday gathering, a birthday party, or just indulging in a sweet treat for yourself, this cake is sure to impress. The combination of flavors and textures—light and fluffy cake with silky, rich cheesecake—creates an unforgettable dessert experience.
By following these detailed steps and tips, you’ll be able to make your own Red Velvet Cheesecake Cake that’s as stunning as it is delicious. Enjoy every bite of this irresistible dessert, and don’t forget to share with friends and family!
