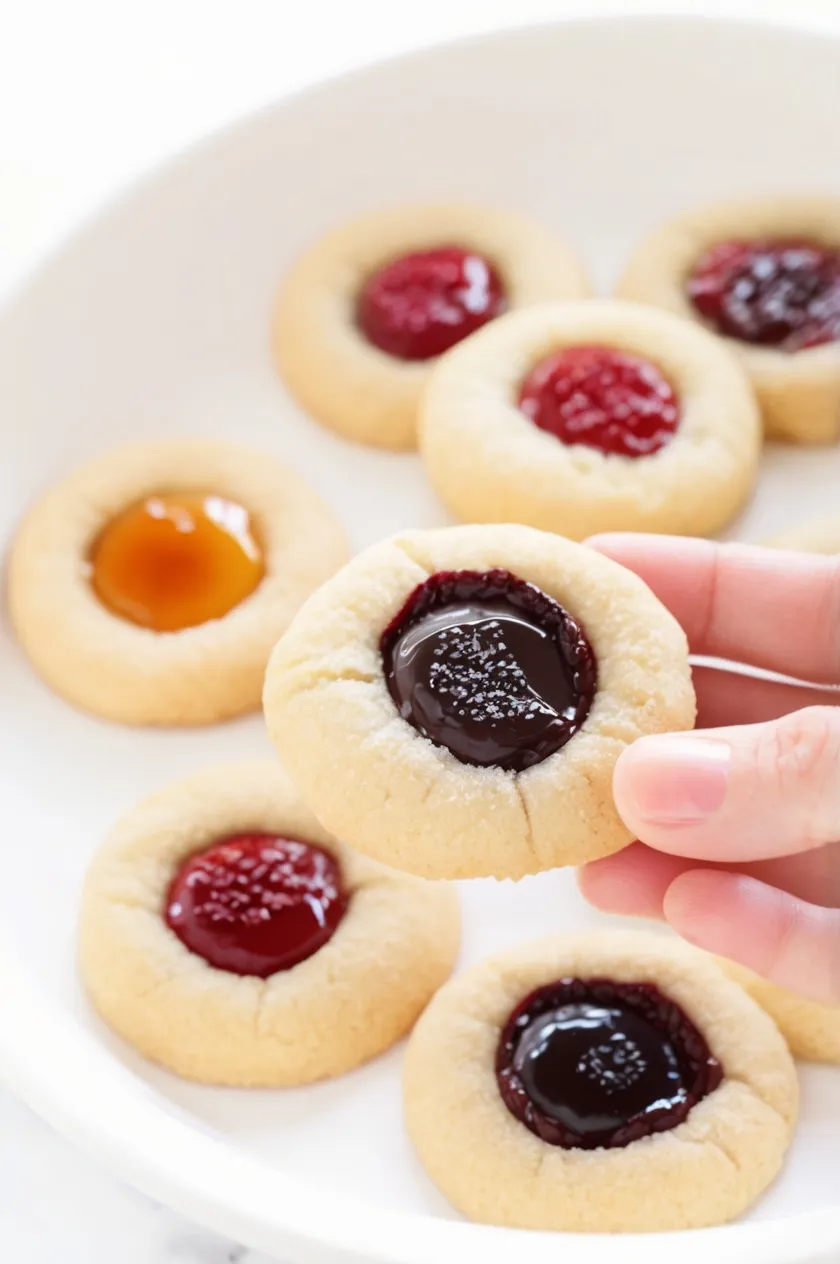
Craving something sweet and buttery? Thumbprint cookies are a perfect treat for any occasion! These simple yet delicious cookies feature a soft, buttery base and are filled with your favorite jam or preserves.
With their irresistible combination of textures, they’re sure to be a crowd-pleaser at any gathering, whether it’s a casual afternoon snack or a festive holiday spread.
Ingredients List
Creating the perfect batch of Thumbprint cookies requires just a few essential ingredients. Let’s break down what you’ll need to make these buttery, jam-filled delights.
Cookie Ingredients
- 1 cup unsalted butter (softened)
- 2/3 cup granulated sugar
- 1 egg yolk
- 1 teaspoon vanilla extract
- 1/4 teaspoon salt
- 2 1/4 cups all-purpose flour
- 1/2 cup jam or preserves (your choice of strawberry, blueberry, apricot, or other favorite flavors)
Required Kitchen Tools
To make Thumbprint cookies, having the right tools on hand will make your baking process smoother and more enjoyable. Here’s what you’ll need:
- Stand Mixer with Paddle Attachment: This will help cream the butter and sugar to a light and fluffy texture. If you don’t have a stand mixer, a hand mixer works just as well.
- Baking Sheets: Use parchment paper or silicone baking mats to line your baking sheets for easy cleanup and to prevent the cookies from sticking.
- 1/2 Teaspoon Measuring Spoon: This is perfect for pressing indentations into the cookies and ensuring even filling.
- Cooling Rack: After baking, a cooling rack will allow the cookies to cool properly, keeping them crisp and delicious.
With these tools ready, you’re all set to create these irresistible Thumbprint cookies!
Cookie Preparation
Making Thumbprint cookies involves a few simple steps that ensure each one is perfectly baked and filled with jam. Follow these instructions to achieve that soft, buttery base with the perfect jam-filled center.
Creaming the Butter and Sugar
- Preheat and Prepare: Preheat your oven to 350°F (175°C). Line two baking sheets with parchment paper or silicone baking mats and set them aside.
- Cream the Butter and Sugar: In a stand mixer with the paddle attachment, cream the softened butter and granulated sugar together on medium speed for about 1-2 minutes until the mixture becomes light and fluffy. This step creates the foundation for a tender cookie texture.
- Add Egg Yolk and Vanilla: Once the butter and sugar are creamed, add the egg yolk and vanilla extract to the mixture. Mix until fully combined. Scrape down the sides of the bowl as needed to ensure everything is well incorporated.
Mixing the Dry Ingredients
- Combine Salt and Flour: Add the salt and all-purpose flour to the butter mixture. Continue mixing until the dough is fully combined. Don’t worry if the dough looks a little crumbly; that’s completely normal. The dough should come together easily when you handle it.
Shaping the Cookies
Now that your dough is ready, it’s time to shape and fill your Thumbprint cookies. Follow these steps to create those signature indents and add the jam filling.
Forming the Dough Balls
- Shape the Dough: Take about 1 tablespoon of dough and roll it into a ball between your palms. Place each ball onto your prepared baking sheet, spacing them about 2 inches apart.
- Press the Indentation: Using your thumb or a 1/2 teaspoon measuring spoon, gently press into the center of each dough ball to create an indentation. Be careful not to press all the way through the dough; you want enough room to hold the jam.
Adding the Jam Filling
- Fill with Jam: Spoon about 1/2 teaspoon of your preferred jam or preserves into the indentation of each cookie. Feel free to mix and match flavors like strawberry, blueberry, and apricot for a variety of colorful, jam-filled cookies.
- Final Adjustments: Once all the cookies are shaped and filled, they are ready for the oven!
Baking and Cooling
With the cookies shaped and filled, it’s time to bake and enjoy the delicious aroma filling your kitchen!
Baking the Cookies
- Bake: Place the baking sheets with the prepared cookies into the preheated oven. Bake for 8-10 minutes, or until the cookies appear set and slightly golden brown on the edges. The cookies will firm up a bit as they cool.
- Cool on Sheet: Once baked, allow the cookies to cool on the baking sheet for a few minutes before transferring them to a wire cooling rack. Let them cool completely to ensure the jam filling sets and the cookies maintain their shape.
Serving and Decoration
These Thumbprint cookies are perfect on their own, but if you want to add a little extra flair, here are some ideas:
Suggested Toppings and Coatings
- Powdered Sugar: Lightly dust the cooled cookies with powdered sugar for an extra touch of sweetness and a festive look.
- Coconut Flakes: For a fun twist, roll the edges of the cookies in toasted coconut flakes after baking.
- Chocolate Drizzle: If you’re a fan of chocolate, drizzle melted chocolate over the top for an indulgent finish.
Enjoy!
Once cooled and decorated, serve your Thumbprint cookies on a beautiful plate for a treat that’s both delicious and visually stunning. These cookies are perfect for gifting, holiday spreads, or any time you’re craving a sweet bite.
Storage Instructions
How to Keep Thumbprint Cookies Fresh
To keep your Thumbprint cookies fresh, store them in an airtight container at room temperature for up to 5 days. Be sure to layer parchment paper between the cookies to prevent them from sticking together.
Freezing Thumbprint Cookies
If you want to preserve these treats for longer, freeze the cookies in a single layer on a baking sheet. Once frozen, transfer them to a freezer-safe bag or container. They can be stored for up to 1 month. To enjoy, simply thaw at room temperature or warm them up in the oven for a few minutes.
Thumbprint Cookies
Ingredients
- 1 cup unsalted butter (softened)
- 2/3 cup granulated sugar
- 1 egg yolk
- 1 teaspoon vanilla extract
- 1/4 teaspoon salt
- 2 1/4 cups all-purpose flour
- 1/2 cup jam or preserves (your choice of strawberry, blueberry, apricot, or other favorite flavors)
Instructions
- Preheat your oven to 350°F (175°C). Line two baking sheets with parchment paper or silicone baking mats and set them aside.
- In a stand mixer with the paddle attachment, cream the softened butter and granulated sugar together on medium speed for about 1-2 minutes until light and fluffy.
- Once the butter and sugar are creamed, add the egg yolk and vanilla extract to the mixture. Mix until fully combined. Scrape down the sides of the bowl as needed.
- Add the salt and all-purpose flour to the butter mixture. Continue mixing until the dough is fully combined. The dough should look crumbly but will come together when handled.
- Take about 1 tablespoon of dough and roll it into a ball between your palms. Place each ball onto the prepared baking sheet, spacing them about 2 inches apart.
- Using your thumb or a 1/2 teaspoon measuring spoon, gently press into the center of each dough ball to create an indentation.
- Spoon about 1/2 teaspoon of jam or preserves into the indentation of each cookie. You can use a variety of jam flavors such as strawberry, blueberry, or apricot.
- Bake the cookies in the preheated oven for 8-10 minutes, or until they are set and slightly golden brown on the edges.
- Allow the cookies to cool on the baking sheet for a few minutes before transferring them to a wire cooling rack. Let them cool completely.
Conclusion
Thumbprint cookies are a classic and versatile treat that can be enjoyed year-round. With their buttery texture and jam-filled center, they make the perfect addition to any dessert table or a thoughtful homemade gift.
By following these simple steps, you can create a batch of these delightful cookies that everyone will love. Whether you stick to traditional jam or get creative with different fillings, these cookies will always bring joy to your kitchen.